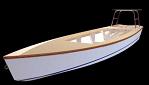
|
|
 |
|
Fairing the Bottom & Transom - A Strategy
|
I've mentioned it before, but it bears repeating,
I suck at fairing. However, over the last couple of days I've made a significant breakthrough.
On a planing
hull (a.k.a. "go-fast boat"), the shape of the bottom can have a noticeable and sometimes a very negative impact on the performance
and handling of the boat. A hook, or concave profile in the hull bottom, parallel the the keel will waste power, provoke
bad trim, and cause porpoising. It can slow or prevent the boat from getting on plane. Rocker is the opposite
of a hooked bottom and this condition is where the hull bottom has a outward hump or curve. This can cause steering
difficulties and other issues. So basically, on a planing hull (go fast boat), you want the bottom to have flat surfaces
without low spots or humps.
If you did a good job stitching and positioning the plywood panels, your bottom
pieces should be flat and the chine edge gradually drop away from the keel line from the transom forward. Placing a
rigid straight edge parallel to the keel should show you if there are any gaps that will need to be brought level. If
you can correct the gaps in the stitching phase by adjusting a panel or shimming under a stringer or frame edge, do it.
A
predictable thing happens when you start laminating the panels seams with fiberglass tape and cloth. The once flat and
"gapless" expanses now have this high build up fiberglass and epoxy along the keel, chine and transom edges. If you
place a straight edge across any direction you're going to have a gap. Some places may have a little sliver of light
showing and other places may have so much gap that you gasp as the straight edge quivers in your hand. You think to
yourself "no F-ning way".
Now, after a couple of weeks of filling low areas and sanding like a madman, I just wasn't
getting the bottom "ruler flat" in any particular direction. Sure I was building up low areas and getting things somewhat
close to fair on the bottom, but not the super flat I was counting on. So I finally said enough was enough and stepped
back to see what I've been doing wrong and why things weren't to my expectations.
My 1st conclusion was that a couple
of the tools I was using to lay down layers of fairing compound were just aggravating the problem. I had a 2' long drywall
or wallpaper knife that I was using to level the fairing compound over each half of the hull bottom. This would be an
adequate tool IF you kept the edge perpendicular to the hull surface as you dragged it across the areas you're trying to level.
As soon as the long edge gets a cant or angle to it, I was putting a bow in the tool that translated to fairing compound by
dishing out the area I was trying to level. Not a good thing. I was wasting materials and time using this method
and getting pretty poor results. I didn't check my work while the compound was still soft, so I was waiting until it cured,
only to find I still had gaps. My next obvious conclusion was that if the edges supporting the leveling tool weren't
smooth & level as I drew the knife across an area, then the surface being faired would have the same profile as the edges
supporting the tool. Pretty obvious stuff, but then again I suck at faring!
So, I came up with a strategy and
a new tool. The strategy is very simple. If you've ever watched or poured concrete for a floor or side walk, you'll
get the idea. To get a flat surface on a concrete floor you use forms along the edges that determine the depth and use
the tops of those forms as a guide to level the concrete out. You simply take a straight board and draw it along the
form edges to level out the concrete that gets dumped in between. Now this analogy is similar to what needs to be done to
all the low areas created by the build up of fiberglass along all the edges on the hull bottom and transom.
On the
hull, the "form" edges will be the keel line, transom edge, and chine edges. If those are straight and and flat, then
drawing a straight edge though the fairing compound dumped into the gaps will leave you with a flat and fair surface.
So the first thing I did was to make sure the keel line was straight for the length of the bottom until in transitions into
the bow. Any low or high areas needed to be made flat. Now the tool I switched to for this step is a 3' piece
of RIGID and straight extruded aluminum I had bought for a router table fence. I had this lying around, so to keep from
ruining it with epoxy, I taped the flat faces with clear packaging tape. Epoxy doesn't bond well to packaging tape.
I don't recommend going out and buying a fancy piece of extruded aluminum, you just need something very rigid and with a straight
edge. Now when I leveled the low spots, the resulting surface was level when the compound cured - and there were no
gaps! What a concept. After the keel line was made level and true for about 3" on either side of its centerline,
I checked and used the same techinique for the transom edge and the chines. The chine edge starts dropping away from
the bottom around Frame C, so I faired the chine edges up to the point where the drop was noticeable and just made sure that
the surface inboard to the "dropped" edge was flat.
So now the perimeter of the hull bottom sections was straight
and flat. The only thing left was to use a rigid, straight tool to pull through the fairing compound and level the large
expanses between all higher edges. I decided if I filled in the gaps from keel line to chine edge, then the resulting
surface would be flat in both forward and aft directions as well perpendicular to the keel. Since the edges defining
the outline of these areas were straight & fair, then the resulting surface in between will end up flat & fair in
all directions, right?
Well, as it turns out, this is exactly what happened. So after 2 weeks of torturous
filling and sanding, I finally had a hull bottom and transom that were ruler flat. If I place a straight edge running
parallel to the keel line, there's no gaps. If I place the straight edge from the keel to the chine, no gaps.
This covers an area from just forward of Frame C all the way back to the transom, on both sides of the keel. I really
was sweating over getting the bottom truly fair and it's a big relief now that I'm there.
|
|
|
|
|
|
|
|
|
|
|
|